이전 포스트에서는 인증이 필요한 API와 인증 없이 접근 가능한 API를 테스트해보았다.
그렇다면 이제 Role을 설정하고, Role에 따라 API에 접근할 수 있도록 설정해보자. 여기에서는 user와 admin 두 가지의 Role을 설정해보려고 한다.
Role 생성
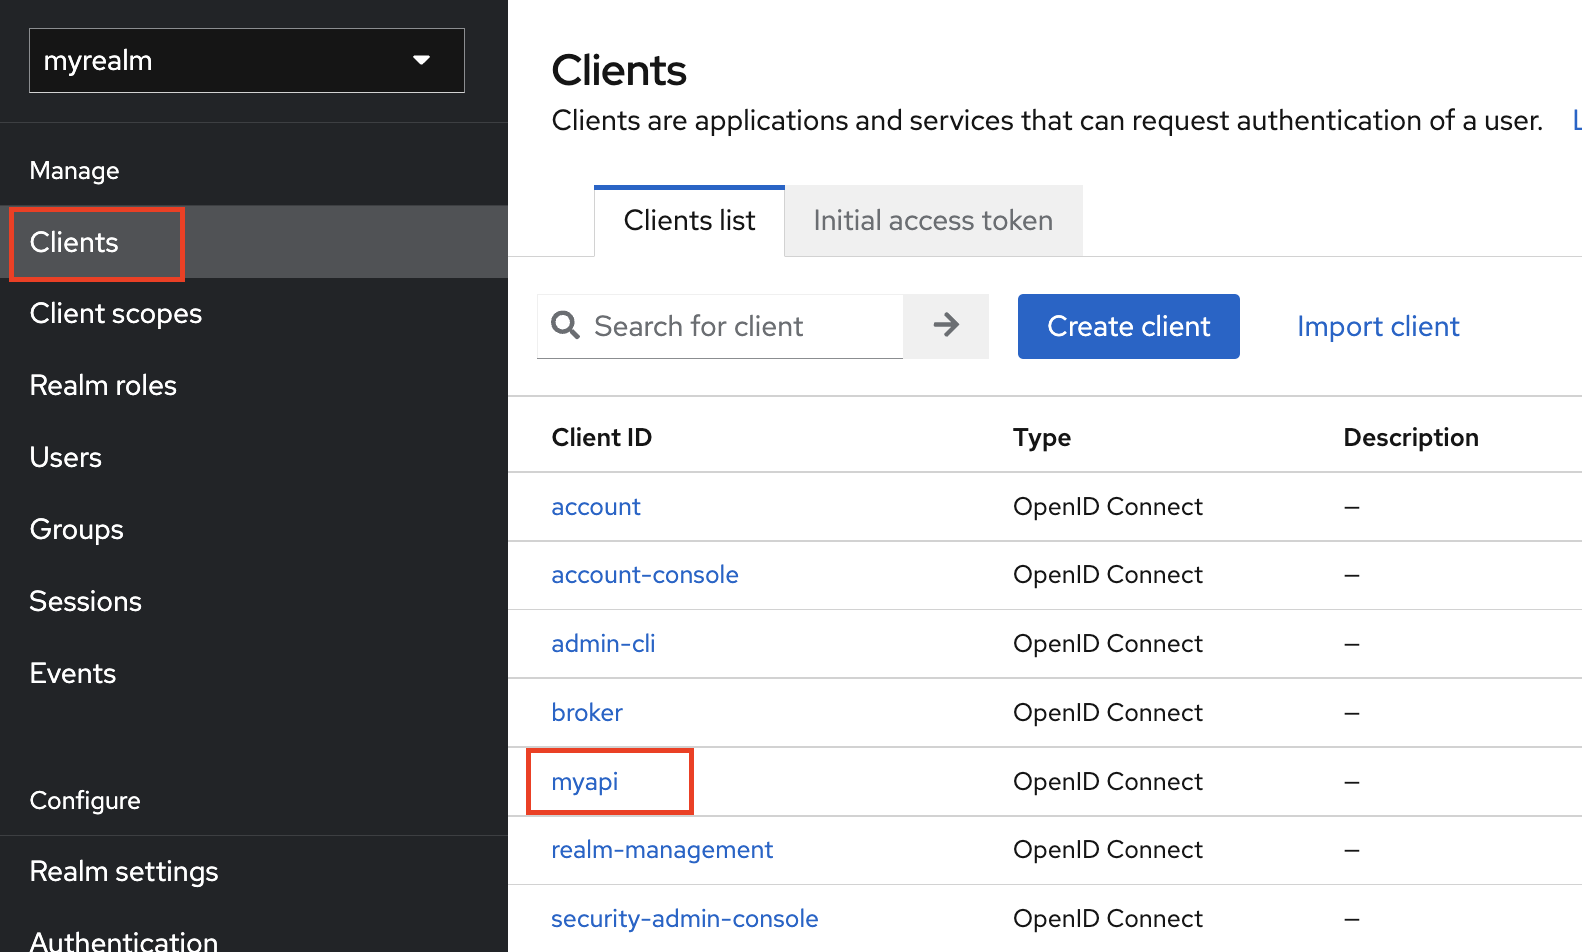
먼저 Client Role을 생성해야 한다. 관리자 콘솔에 접속하고, 좌측 메뉴의 Clients - 생성했던 Client 이름 (여기서는 myapi) 을 클릭한다.
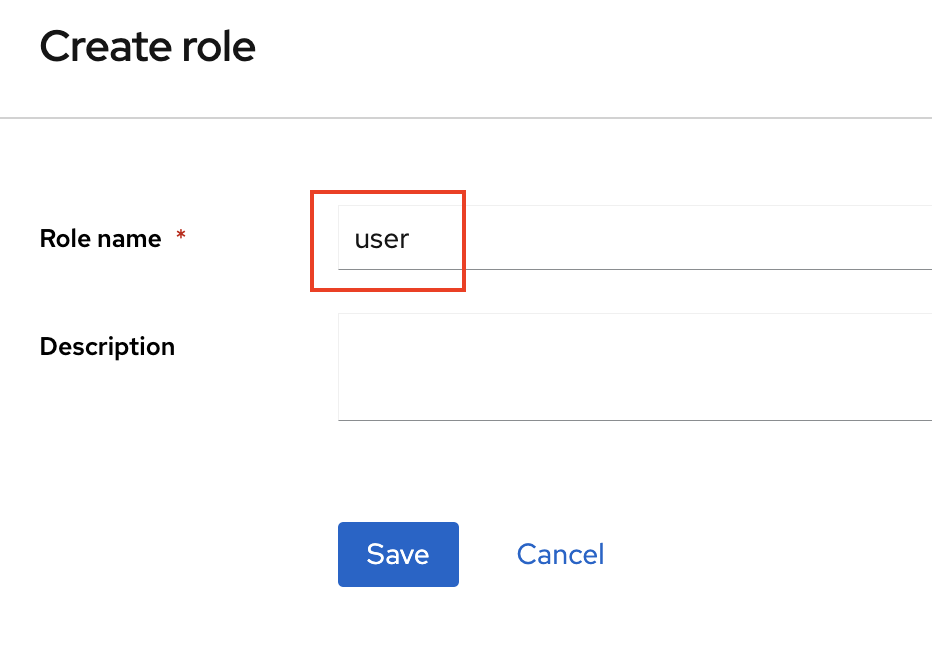
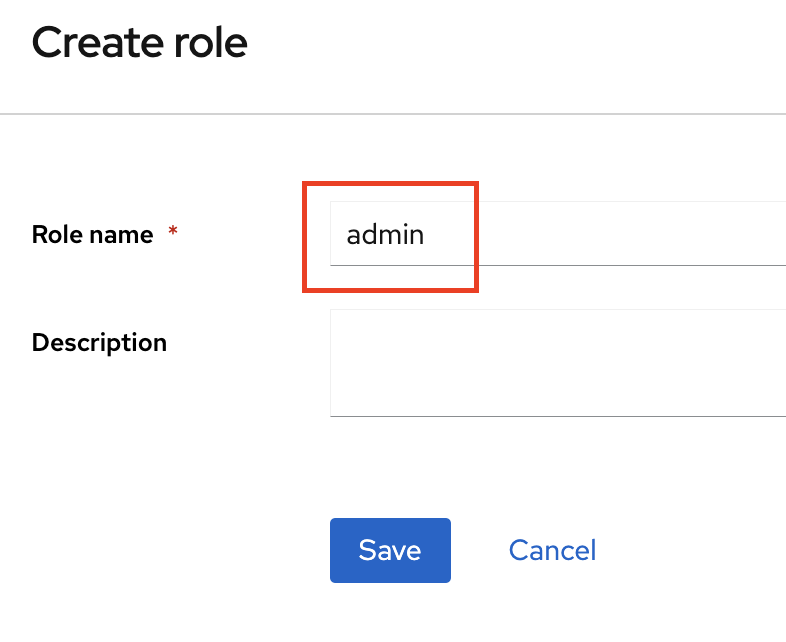
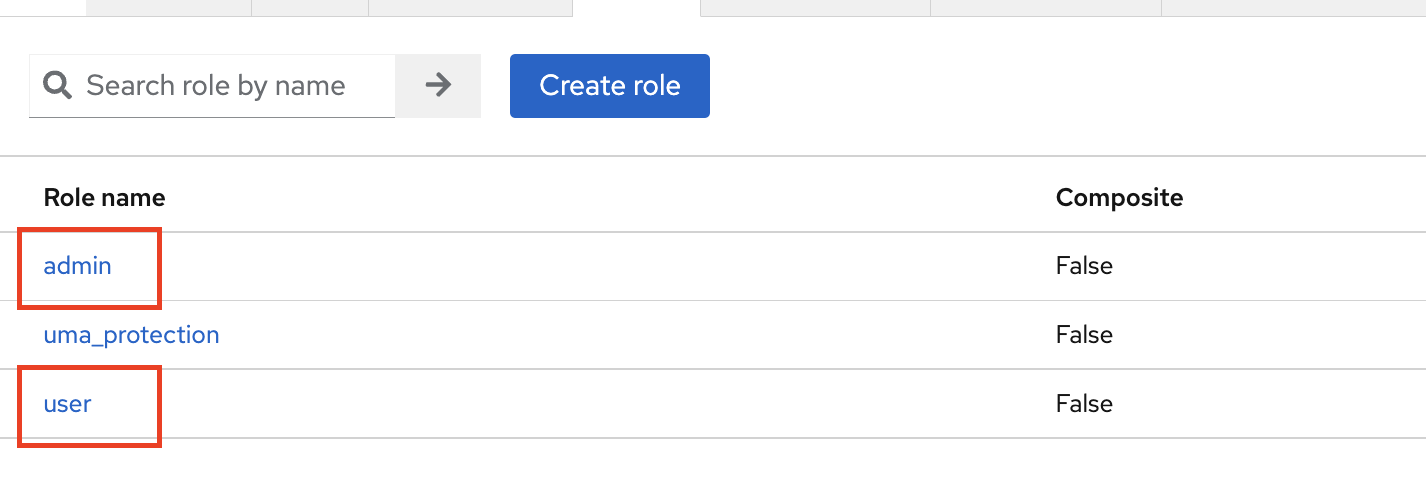
상단 탭의 Roles - Create role을 클릭해 Role을 생성한다. 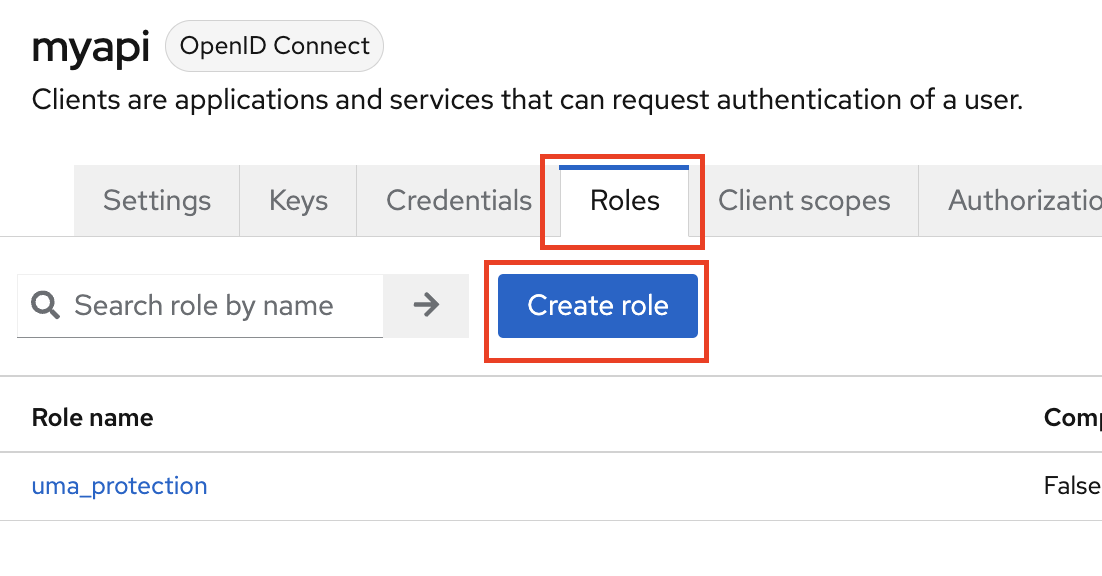
각 Role의 이름을 user, admin 으로 입력하고 Save를 눌러 저장한다.
Role 설정
생성한 Role을 각 User에게 부여해보자.
user role 설정
앞서 생성했던 사용자 user1에게 user Role을 설정하자.
Users 페이지 - 상단의 Role mapping 탭 - Assign role을 클릭하여 Role 설정 페이지로 이동한다. 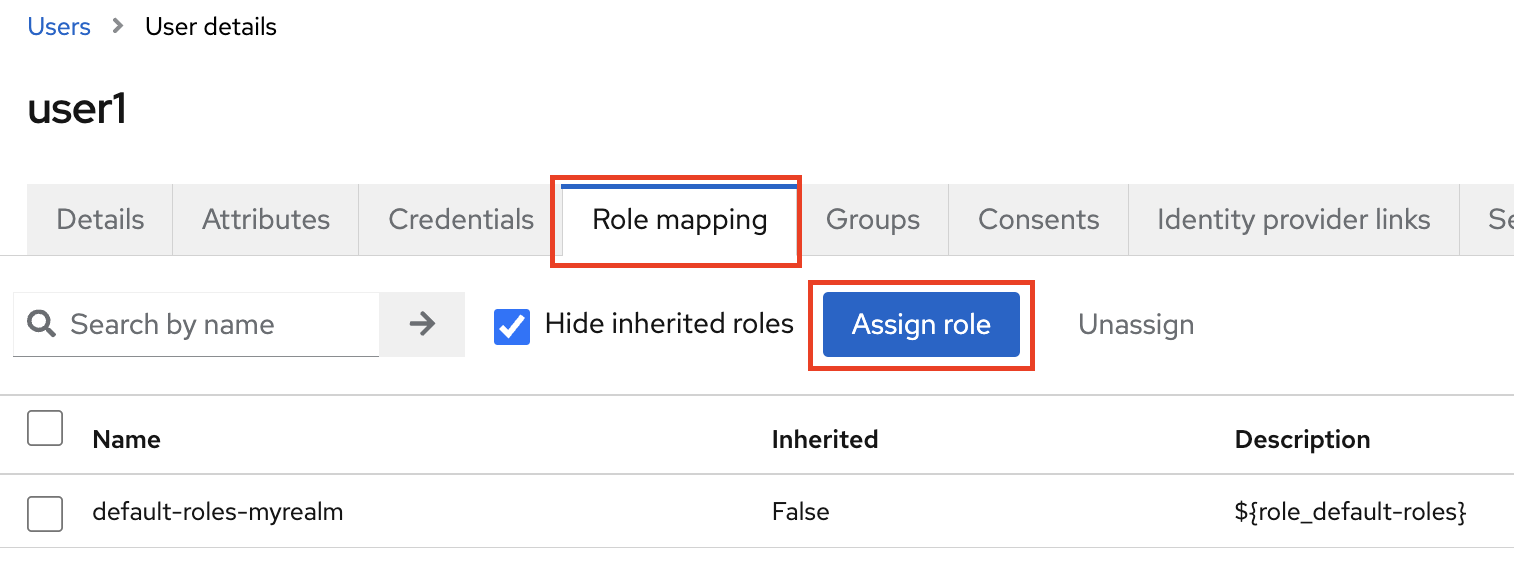
상단의 필터 select box를 눌러 client role이 나타나도록 필터를 변경한다. 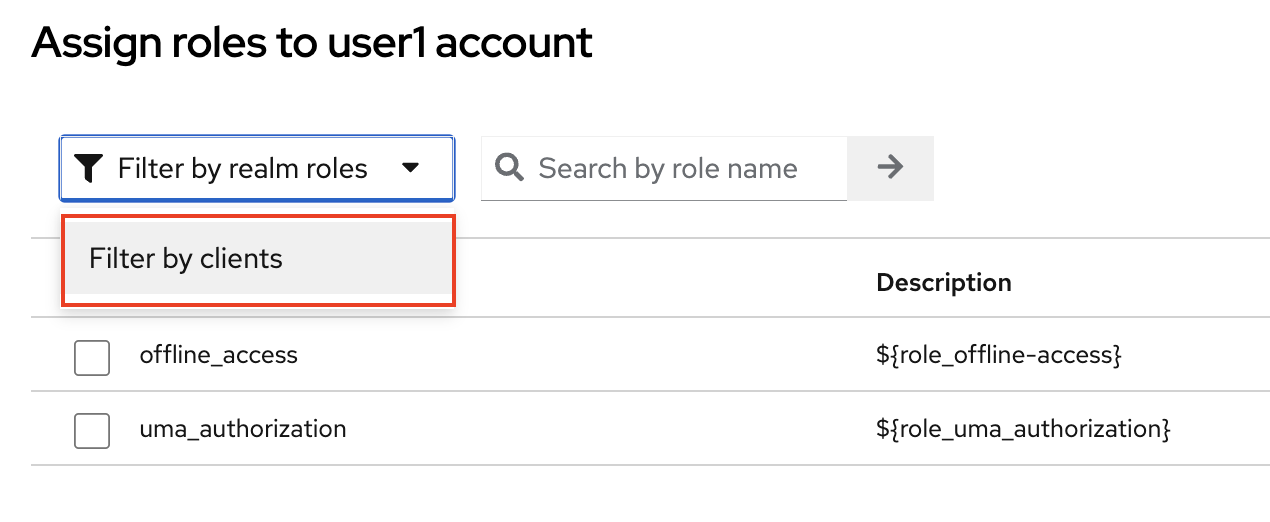
myapi client의 user Role을 선택한 후, 하단의 Assign을 눌러 Role을 할당한다. 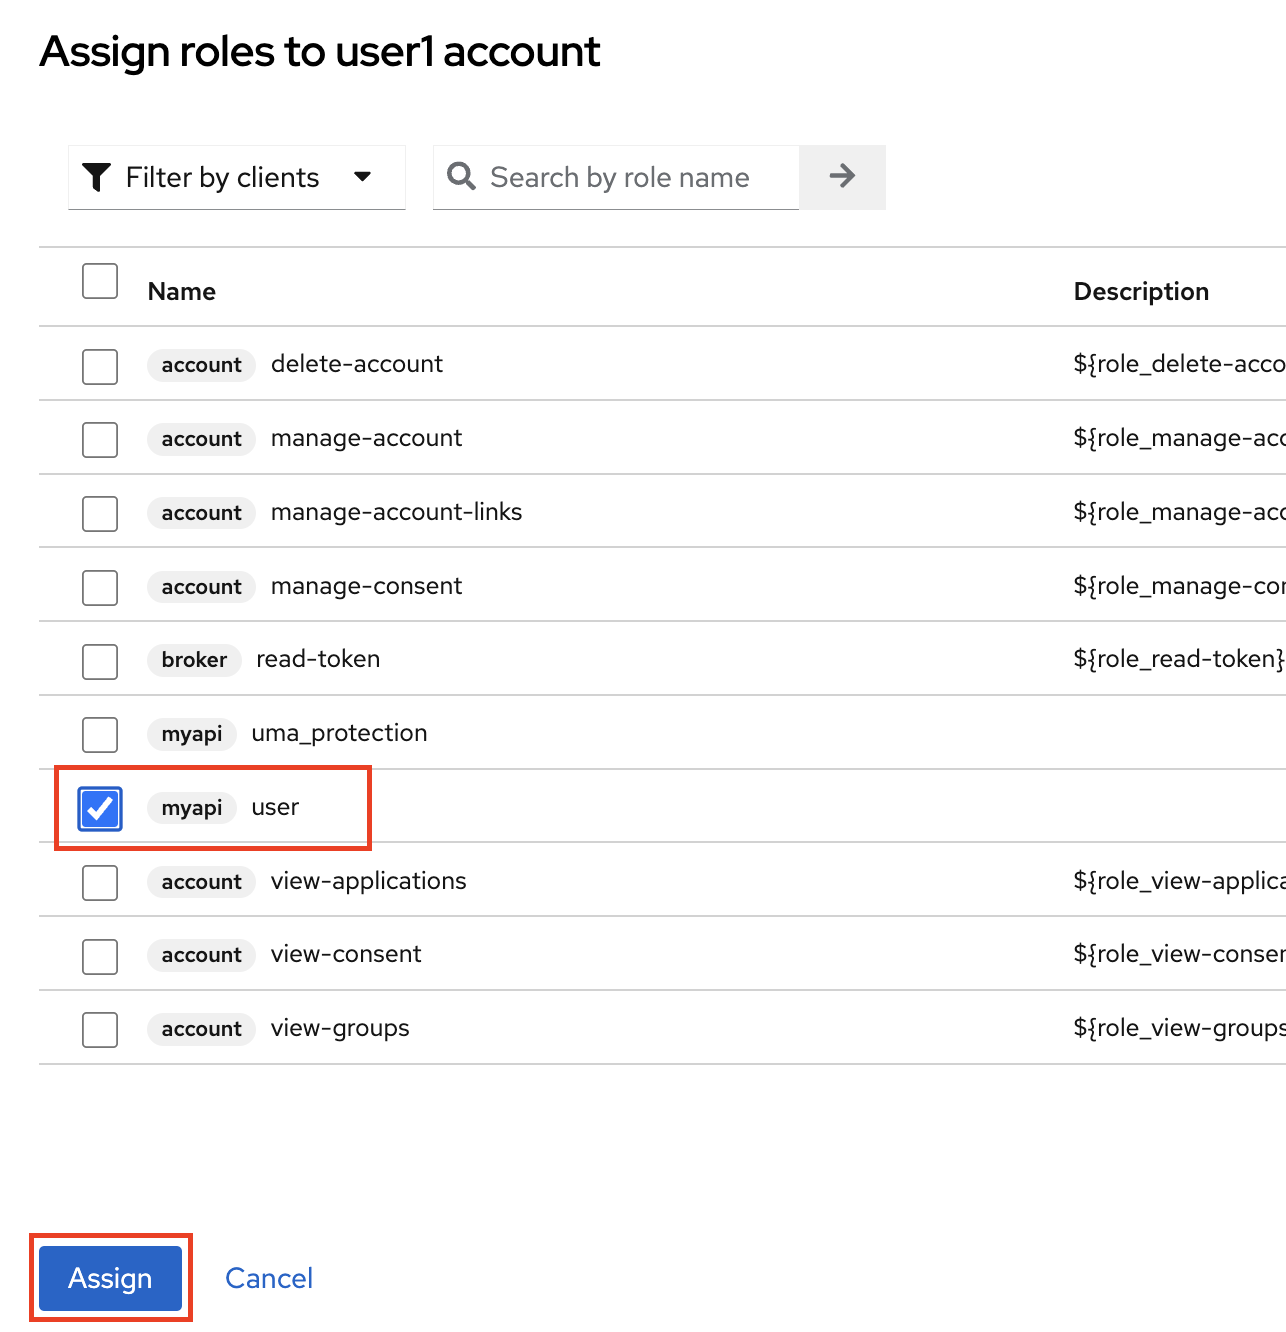
admin role 설정
추가로, admin Role을 부여할 새로운 User를 하나 생성하자.
admin1이라는 User를 생성하고, 동일한 방법으로 Role을 할당한다. 

API에 Role 별로 접근하도록 설정
이제 Spring Boot 프로젝트 (api 서버) 를 열어, Role 별로 접근할 수 있는 엔드포인트를 만들어보자.
앞서 만들어두었던 TestController 클래스에 다음 코드를 추가한다.
1
2
3
4
5
6
7
8
9
10
11
@GetMapping("/user-allowed")
@RolesAllowed("user")
public ResponseEntity userAllowed() {
  return new ResponseEntity<>("This request for USER ROLE!", HttpStatus.OK);
}

@GetMapping("/admin-allowed")
@RolesAllowed("admin")
public ResponseEntity adminAllowed() {
  return new ResponseEntity<>("This request for ADMIN ROLE!", HttpStatus.OK);
}
그리고 KeycloakSecurityConfig 클래스에 아래와 같이 코드를 수정한다.
1
2
3
4
5
6
7
8
9
10
11
12
13
14
15
16
17
18
19
20
21
22
23
24
25
26
27
28
@KeycloakConfiguration
@EnableGlobalMethodSecurity(jsr250Enabled = true, prePostEnabled = true, securedEnabled = true)
@Import({KeycloakSpringBootConfigResolver.class})
public class KeycloakSecurityConfig extends KeycloakWebSecurityConfigurerAdapter {

  @Autowired
  public void configureGlobal(AuthenticationManagerBuilder auth) throws Exception {
    KeycloakAuthenticationProvider keycloakAuthenticationProvider = keycloakAuthenticationProvider();
    keycloakAuthenticationProvider.setGrantedAuthoritiesMapper(new SimpleAuthorityMapper());
    auth.authenticationProvider(keycloakAuthenticationProvider);
  }

  @Bean
  @Override
  protected SessionAuthenticationStrategy sessionAuthenticationStrategy() {
    return new RegisterSessionAuthenticationStrategy(new SessionRegistryImpl());
  }

  @Override
  protected void configure(HttpSecurity http) throws Exception {
    super.configure(http);

    http.authorizeRequests()
        .antMatchers("/permit-all").permitAll()
        .anyRequest().authenticated();
  }

}
@EnableGlobalMethodSecurity
- jsr250Enabled
- 메소드 단계에서
@Secured어노테이션을 사용해야 하는 경우, 해당 파라미터를 true로 설정
- prePostEnabled
- 메소드 단계에서
@PreAuthorize및@PostAuthorize어노테이션을 사용해야 하는 경우, 해당 파라미터를 true로 설정
- securedEnabled
- 메소드 단계에서
@RolesAllowed어노테이션을 사용해야 하는 경우, 해당 파라미터를 true로 설정
다시 Postman으로 돌아와 user1 계정 (user Role 부여된 계정) 으로 액세스 토큰을 발급받는다. 
발급받은 액세스 토큰을 헤더에 넣어 /user-allowed 엔드포인트로 요청을 날리면 200(OK)이 리턴되지만, /admin-allowed 엔드포인트로 요청을 날리면 user1은 admin Role을 갖고 있지 않으므로 403(Forbidden)이 리턴된다. 

이번엔 admin1 계정 (admin Role 부여된 계정) 으로 액세스 토큰을 발급받는다. 
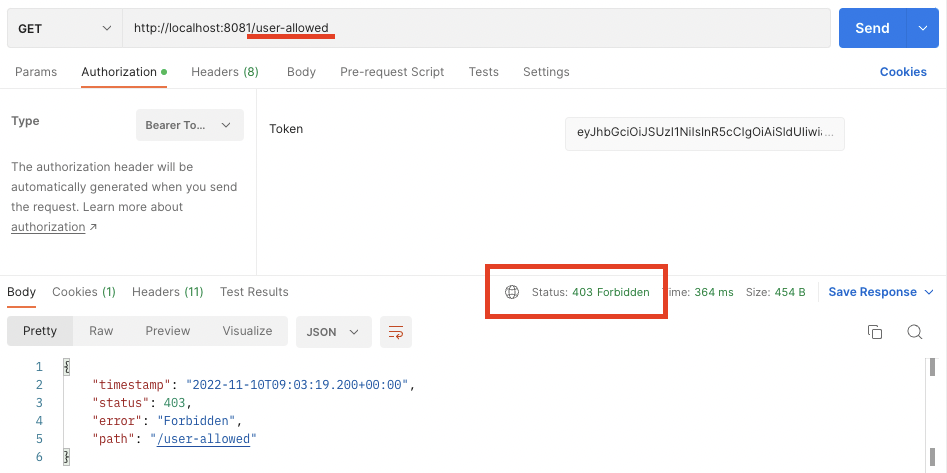
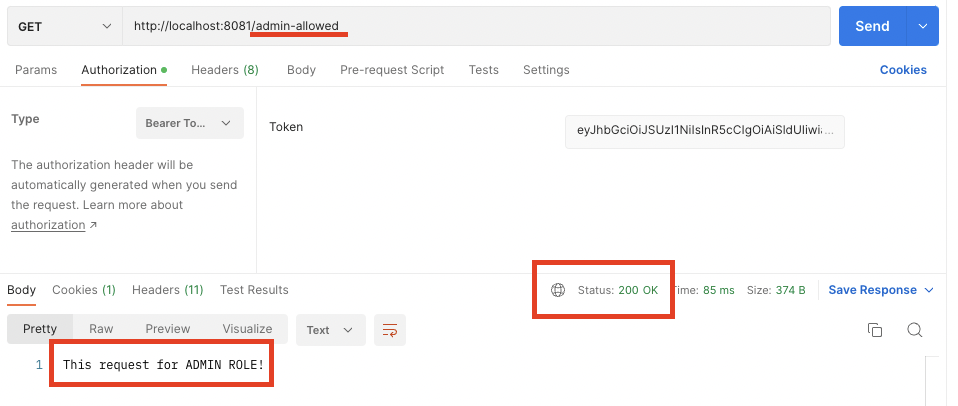
발급받은 액세스 토큰을 헤더에 넣어 /user-allowed 와 /admin-allowed 엔드포인트에 요청을 날리면, 다음과 같이 각각 403(Forbidden), 200(OK)을 리턴하는 것을 확인할 수 있다. 